
Whether you’re trying to decide if Wix is the right website builder for you or not, or have already bought a subscription and are now looking for ways to start using it, you might need some helpful tips and advice. Truth be told, even the simplest builders can prove to be a bit tricky if you’re using them for the first time! That’s where a Wix tutorial can help immensely.
Well, here, you’ll find exactly that.
Wix is one of those builders that likely need no formal, extensive introductions. Even so, while it’s marketed as one of the simplest and most straightforward website creation tools on the current market, there’s much more to it - we’ll get to that.
All of that being said, I’ll try to keep the article short and to-the-point - we’ll focus on the essential aspects of how to edit Wix websites, and once you’ve got that figured out, it should be smooth sailing from there on out.
Table of Contents
- 1. Wix Tutorial: Why Choose Wix?
- 2. Keeping Things Simple: A 7-Step Process to Learning How to Use Wix
- 2.1. Step 1: Registration, Wix ADI and Manual Site Setup
- 2.2. Step 2: Template (Theme) Choices
- 2.3. Step 3: Get to Know the Interface Layout
- 2.4. Step 4: Working With Your Pages
- 2.5. Step 5: Adding Apps and Widgets
- 2.6. Step 6: SEO and Your Site Analytics
- 2.7. Step 7: Domain Name
- 3. Price
- 4. Conclusions
Wix Tutorial: Why Choose Wix?
If you’re reading this Wix tutorial with the Wix site editor opened in a separate tab, chances are that you already know why you’re using this particular website builder instead of some alternative one.
That being said, it’s perfectly reasonable to still wonder - what’s so special about Wix, anyway?
A couple of things, honestly.
First and foremost, as noted in the introductory part of this Wix tutorial, the site creator in question is among the simplest ones to use. Naturally, this is a huge point of attraction to most of the industry newcomers, especially those people who have never even heard about a website builder before, yet still want to create and run their own website.
| WIX | |
| Excellent | |
| Good | |
| Good | |
|
Visit site
Read review |
|---|
Table: The features of Wix
That’s far from being the only thing that makes Wix special, however. On top of being super-simple to use, Wix also offers something very special to the user - the option to skip through all of the site design processes and let the builder create the site for you, from start to almost-finish.
What I’m talking about here is called Wix ADI - a form of artificial intelligence that Wix utilizes. It’s a very unique tool - I myself have never seen anything like it with other website builders.
More than 500 different templates to choose from, a true drag-and-drop editor, an advanced AI system - it’s no wonder that Wix is often considered to be the leader in the website builder industry. With that being said, let’s talk about how to edit Wix websites, and about all of the core features that you should get to know, too.
Keeping Things Simple: A 7-Step Process to Learning How to Use Wix
Since this is a Wix tutorial for beginners, we’ll take things from the top and start off by looking at the registration process of the builder in question.
One thing that you should keep in mind when learning how to use Wix is the fact that you basically have two routes to take when it comes to the initial setup of your site - the Wix ADI route, and the manual one. I’m getting ahead of myself, though.
Step 1: Registration, Wix ADI and Manual Site Setup
As with most other top-tier website builders out there, the initial registration process on Wix is very simple and quick.
Upon entering all of your important information (name, email, coming up with a password, etc.), you’ll be thrown into a couple of screens that will allow you to pick some options from a drop-down menu.
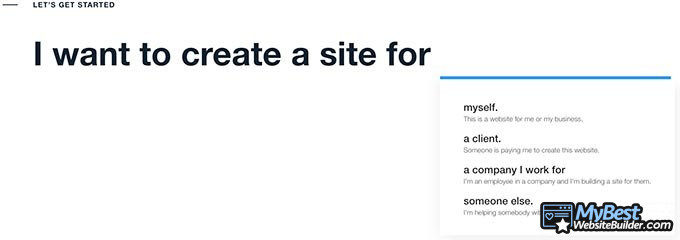
To tell you the truth, no matter what you pick, it doesn’t really make all that big of a difference in the grand scheme of things. Here, you’ll simply tell Wix about the type of a website that you’re planning to create, and also your prior experience with the processes of building websites.
Continuing with this Wix tutorial, eventually, you’ll be given a choice - either use Wix ADI, or set up a site manually.
Now, THIS is an actual important part of the registration & initial setup processes.

You see, depending on what you pick at this stage, you’ll face one of two outcomes - either you’ll be able to create a site really fast, yet have minimal initial manual input options, or take some time, but do everything yourself.
In all honesty, there isn’t really a “right” or “wrong” way to go about it. Frankly, most people would probably go with the first options - the Wix ADI one.
That’s simply because, even if you create your site with artificial intelligence, you’ll still learn how to edit Wix websites “the old-fashioned way” - meaning, without the help of some sentient AI. In other words, you can create the site with Wix ADI, and then simply alter the results at your own whim.
Latest Squarespace Coupon Found:
SAVE 20%
Squarespace Limited-Time Deal
Grab this Squarespace offer code & enjoy a lovely 20% off on any selected Squarespace subscription plan. Create your dream website NOW!
Step 2: Template (Theme) Choices
After you’re done with some of the more textual information-inputting processes, next comes the template selection phase.
No matter how you chose to create your site, any and all reputable Wix website tutorials are going to tell you that the template selection phase is frankly one of the most important steps in the entirety of your site creation process.
The template that you choose is going to not only dictate the visual and functional layouts of your page, but it will also serve the purpose of “inviting” your potential site visitors to browse through your page.
Naturally, in the same manner how a modern and beautiful site is going to attract visitors to come and browse through it, it does also serve another purpose, too - namely, that of legitimizing your intentions.
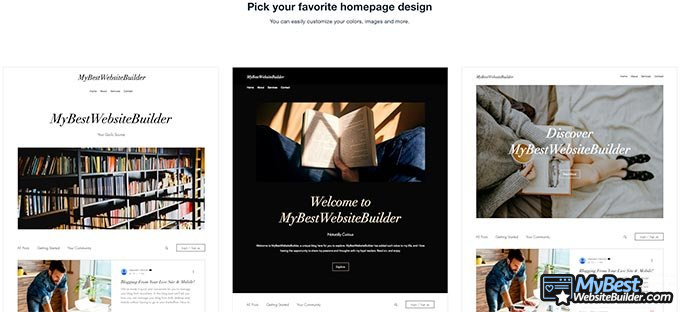
It doesn’t even matter what those intentions are - selling a product, writing an influential blog, or even showcasing your photos or music. An archaic-looking website will surely provoke thoughts of unreliability within your visitors!
I tell you all of this simply because I want to help you understand that, in the entirety of this Wix tutorial for beginners, the template selection process is among the most important ones.
Having said that, though, the actual selection process is rather simple, both while doing it with the Wix ADI, and manually. Just pick the one that feels right to you, and roll with it - worst-case scenario, you’ll be able to change it later.
Step 3: Get to Know the Interface Layout
Once you’ve sorted out all of the formalities and chosen your desired theme, you will be immediately thrown into the actual builder interface.
Frankly, this is where all of the magic happens - also, it’s the place that people have the most questions about, and thus go out looking for some Wix tutorials to help them out.
For starters, you should get to know the interface and its layout. In short, you’d do well to press all of the buttons, try out all of the features and see what does what. Don’t hesitate to “go ham” - there’s nothing that you couldn’t reverse, and besides - you do need to get to know the actual builder before you start using it seriously, right?
Most of your site creation (and editing) processes are going to take place by pressing some certain sections on the website’s preview. You can choose to edit the page, change its design, duplicate it, and so on.

The editing options aren't all that extensive at first, but you can surely change the titles, text and images, depending on the template (theme) that you’ve chosen. If you’d like to work on the actual number, position and type of pages, you’ll have to press the “Page” button on the top-left of the editor.
The top of the page is where all of the tools are located, too. You probably don’t need a Wix website tutorial to tell you this, but here, you’ll find page section adding/removing buttons, design customization options, app additions, and so on. Depending on the type of a site that you’re trying to create, you’ll also be able to manage your eCommerce features here, too.
You can also check how your website will look on both mobile and desktop devices, and can find a pretty nifty “Help” section that’ll give you some tips and tricks of using Wix, too - while’s it’s not a full-fledged Wix tutorial, it can surely help you out if you get stuck on some specific issue.

Did you know?
Have you ever wondered which website builders are the best for your business?
See & compare TOP website builders side by sideStep 4: Working With Your Pages
You probably don’t need a Wix website tutorial to help you figure this out, but most of your time working on your site is going to be spent dealing with the actual pages that it contains - adding, customizing, optimizing them, and so on.
That’s actually something pretty obvious from looking at how the Wix website builder is panned out, too - most of the actual builder interface is dedicated to on-page customizations, and the more-general setting can be found in a separate section, altogether.
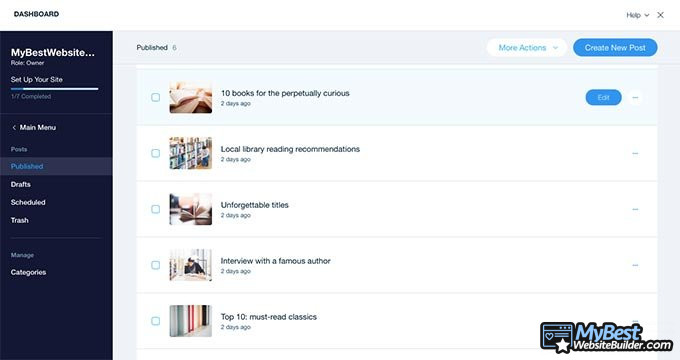
Adding and removing pages is straightforward - it can be done by accessing the earlier-mentioned “Page” section on the top-left part of your screen. Here, you can also manage how your pages act - which are published, which are scheduled, and which are still drafts.
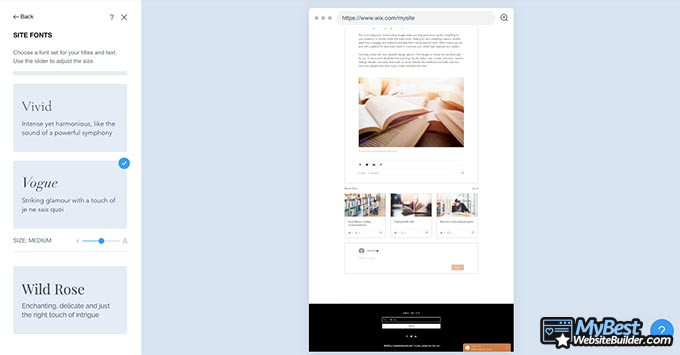
From the “Design” section on the top of the page, you can also edit the actual design part of your pages - fonts, color schemes, and so on. The process is very intuitive and straightforward - while many Wix tutorials often fail to mention this, Wix is a “WYSIWYG” builder - what this means is that you are able to see how your site is going to look live as you’re editing it.
There is also a section called “Add” - as the term implies, here, you can add some certain sections to your page, making it as informative or as visually-driven as you’d like. This is especially cool if you’re using Wix for eCommerce purposes.
Step 5: Adding Apps and Widgets
Another important part of your site creation process involves adding various different features, apps and widgets to your site.
While this is yet another aspect that’s often searched for when it comes to Wix tutorials, the builder has found a way to optimize the process of adding various apps to your page quite well.
From the “Add” section, you can choose either some specific apps that you’d like to add (also, customize) on your page, or browse through all of the available features for your pricing plan. While the core features would include the above-referenced eCommerce functionality, music and blogging tools, there’s a pretty wide selection of some general apps to pick from, too.
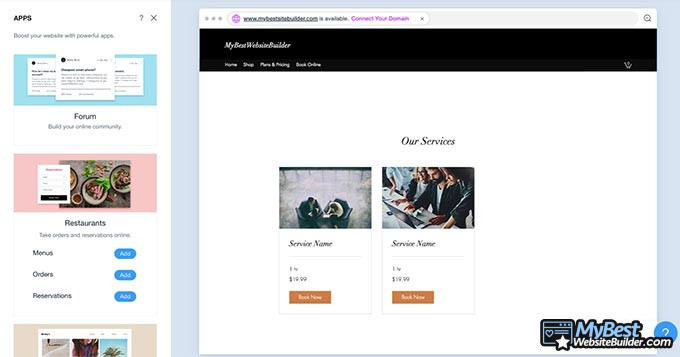
If you decide to customize some of the core apps of your site, you’ll be redirected to a designated interface where you’ll be able to perform all of the necessary processes. If, however, you’d like to add some of the more general features to your site (members area, contact forms, etc.), this can be done from the main window, by picking the app that you wish to add from a list.
Step 6: SEO and Your Site Analytics
While this is more of a Wix tutorial for beginners, we should also touch some of the more advanced features of your site creation process. Well, I guess I should say - site management.
You see, when you finish up creating the first solid version of your website, before publishing it, you should also make sure that the site is optimized for search engines to find and show it to your visitors - in other words, that your site is SEO-friendly.

Proper SEO is going to be crucial in order for your site to do well, and for it to start accumulating traffic. While it’s surely a very important aspect of learning how to use Wix, when it comes to some other website builders, you might sometimes find that not all of them have SEO features.
Not cool. That said, we’re not talking about other builders here - this is a Wix tutorial, and thankfully, this specific website creation tool has got you covered.
Wix does possess SEO functionality - it can be accessed by navigating to the “Site” section of your dashboard, and going through some of the advanced settings. You’ll be able to work on your slug, SEO titles, and even preview how it will look on Google - pretty awesome!
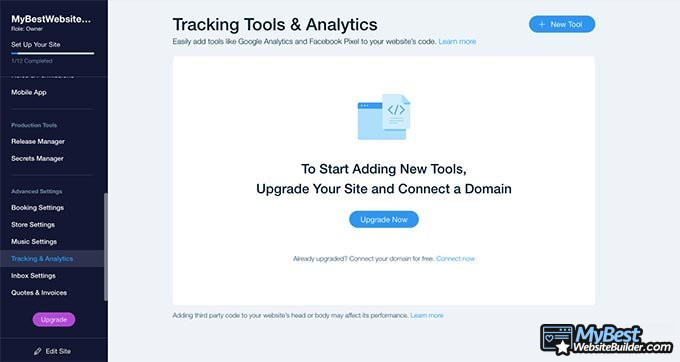
Also, once your site starts gaining some traffic, you’ll also be able to access your analytics to check up and track how it’s doing. You’ll find them in the same “advanced settings” section as the SEO tool.
Step 7: Domain Name
When you’re all set to finalize your site creation processes, and have checked all of the marks on this Wix tutorial, the final thing left to do is to integrate a domain name into your brand new website.
Well, either integrate it if you already have one, or simply purchase one from Wix.

A custom domain name is going to be an integral part of a proper, legitimate website. The great thing about Wix here is that you’ll be able to connect a domain by simply purchasing one of the main plans that the builder has to offer.
On your dashboard, simply scroll up to the “Upgrade” button on the top-right corner of the screen, and you’ll be given the option to go and check out Wix’s pricing plans, compare and contrast them.
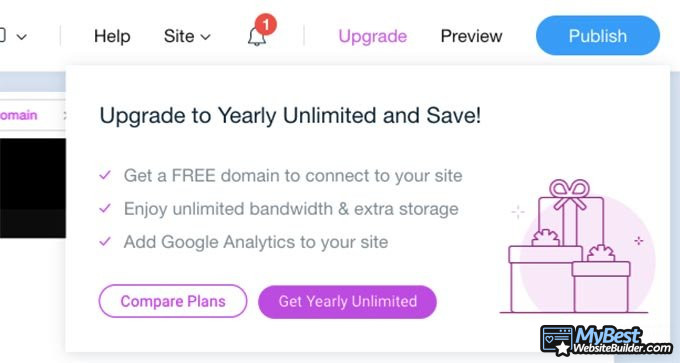
Speaking of which, let’s finish off this Wix tutorial by taking a look at those very same pricing plans.
Price
Wix’s prices are, as follows:
- Combo (for personal use) - $13 per month
- Unlimited (entrepreneurs & freelancers) - $17 per month
- Pro (complete online branding) - $22 per month
- VIP (first priority support) - $39 per month
Currently, there’s a promotion happening, too - all of the plans except for the Combo one are 50% off!

With the added discount, I’m pretty glad to be able to state this in the Wix tutorial - those are some pretty good pricing options!
Conclusions
So - we’ve reached the end of this Wix tutorial! I do hope that it was useful to you, and that you’re now more knowledgeable about Wix and how to use the builder, in general.
| WIX | |
| Very versatile | |
| All Wix Coupons | |
| Customizable, Easy to Use | |
|
Visit site
Read review |
|---|
Table: The Wix website builder
If you’ve found that Wix isn’t really for you, worry not - there are many other amazing website creation tools out there. Do make sure to check out our list of the best ones!
Leave your honest feedback
Leave your genuine opinion & help thousands of people to choose the best website builder. All feedback, either positive or negative, are accepted as long as they’re honest. We do not publish biased feedback or spam. So if you want to share your experience, opinion or give advice - the scene is yours!


